DIY: Shabby Vintage Lamps
I'm back...(maternity leave) and very pleased that I finally got another project completed! On one of my last treasure hunting trips before my sweet baby Finley was born, I found these:

Two vintage brass lamps (10 bucks each) from Goodwill.
They were in great shape... just not my style. So, I went to work with the goal of some sweet and shabby vintage lamps when all was said and done.
First, I will show you how I went about changing the lamp shade. I am really bad and slow at sewing so I wanted to avoid that at all costs. Since the shades were in good shape my thought was... I should just find some fabric and glue it on over the existing fabric! I love hot glue guns... seriously one of the best inventions out there. Here's the shade before:

Here's the supplies gathered for the shades:
white ruffled fabric (walmart), hot glue gun, tacky glue, scissors, and pins

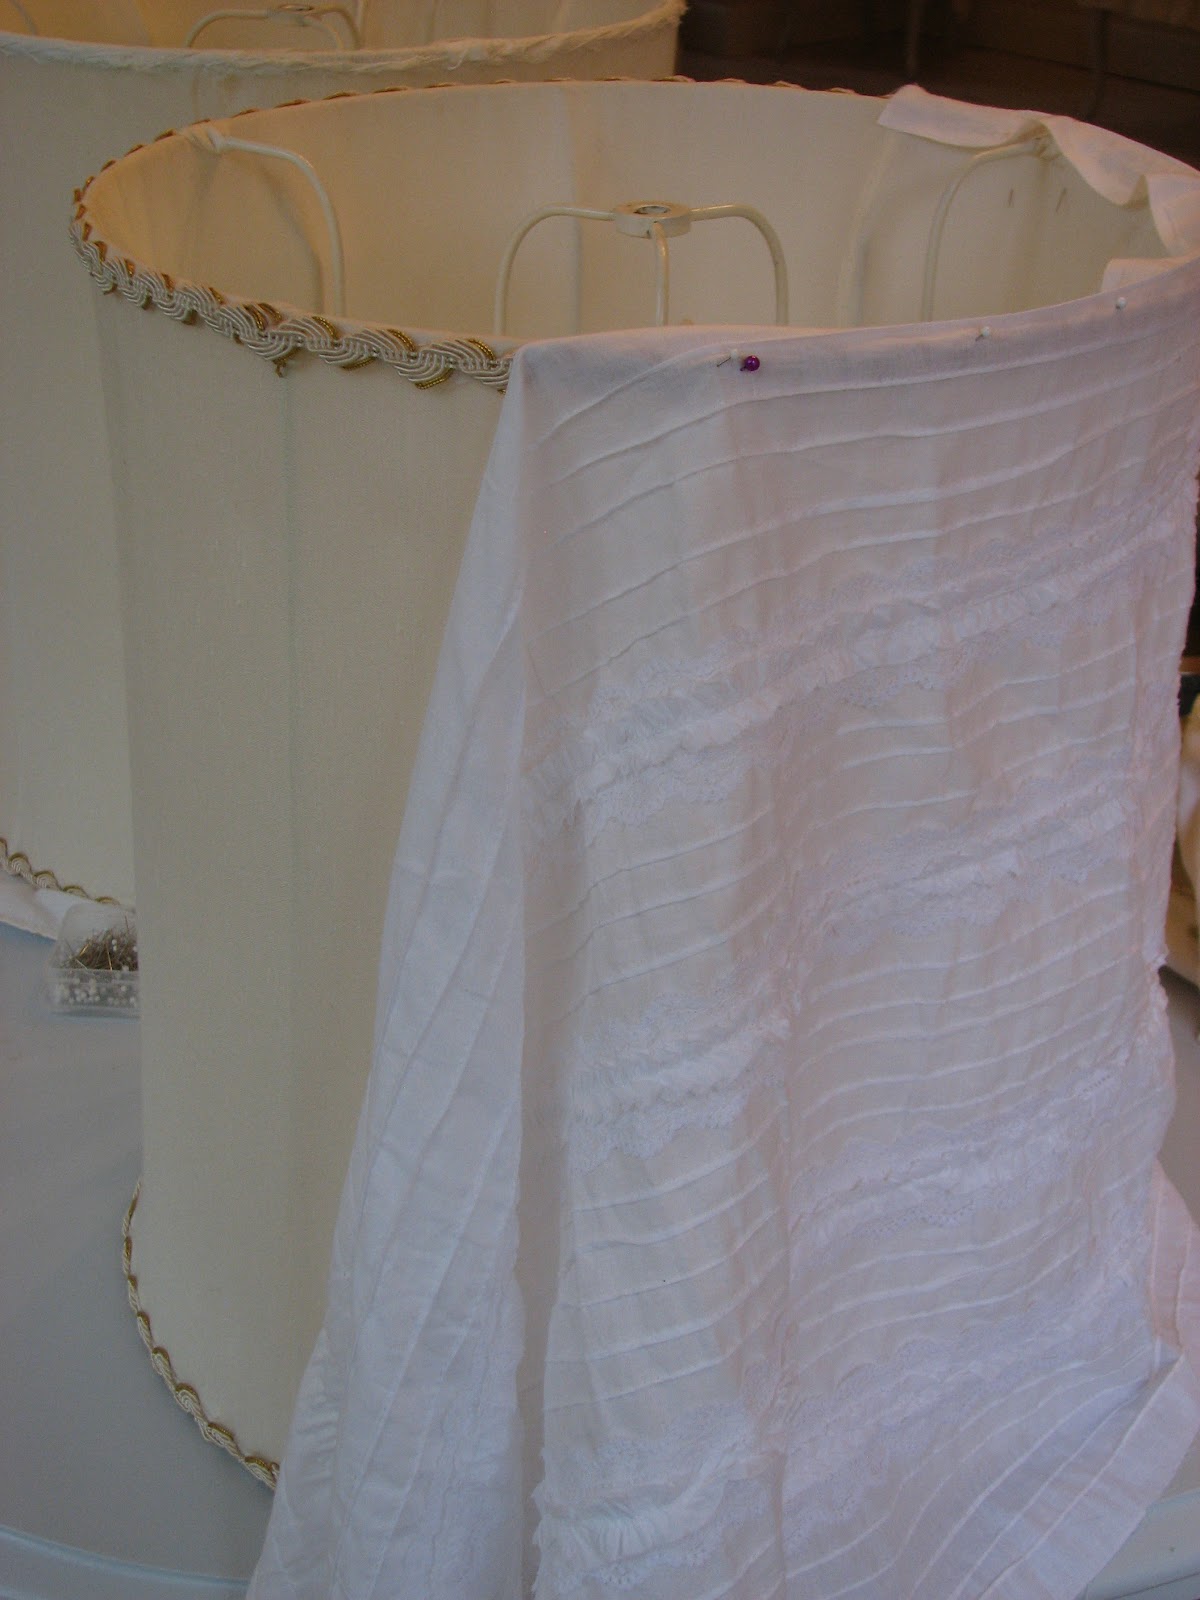
I started by wrapping the fabric around the shade and then cutting it to size (roughly).
Then, I simply started pinning the fabric to the shade making sure to leave extra fabric over the top and bottom of the shade.


After I had it all pinned in place, I glued the extra fabric on the top and bottom of the shade to the inside of the shade with the hot glue gun. It worked great.

Then for the "seam" where the fabric met and overlapped slightly... I just used the tacky glue.

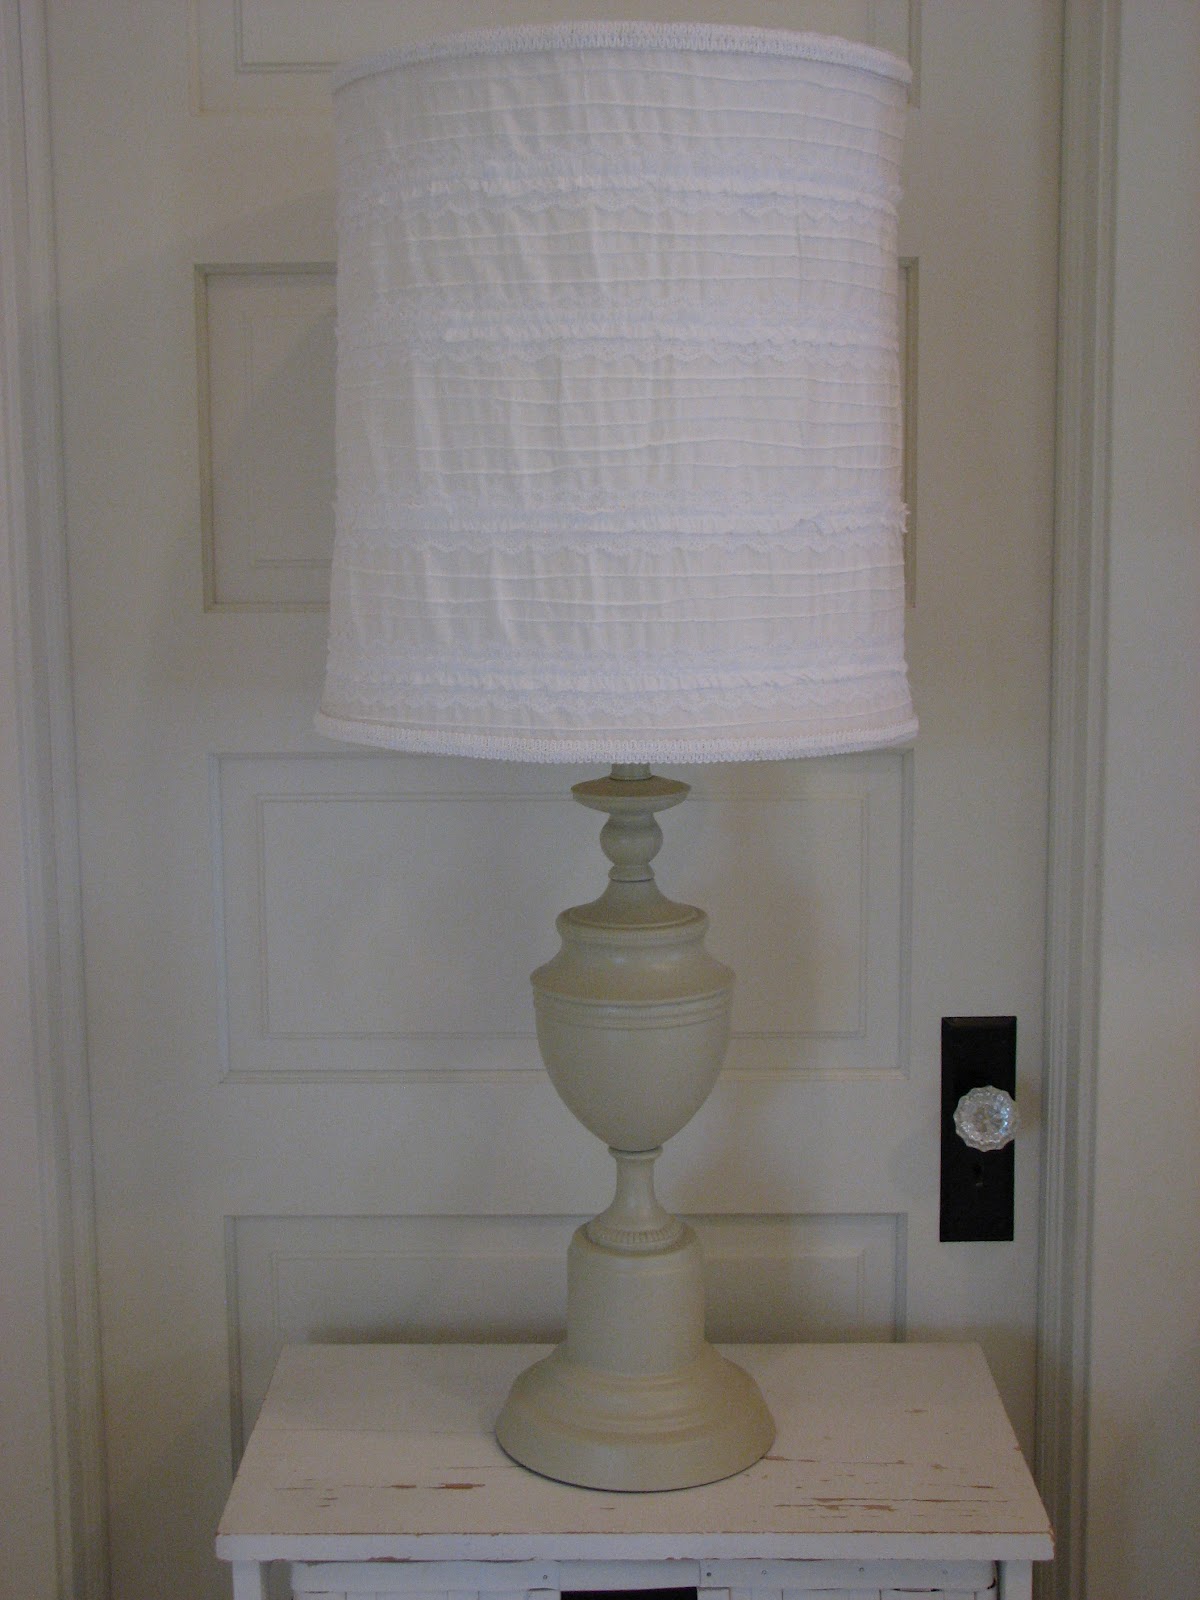
Here's how the shade turned out...

{of note: i love the look of shabby chic so it's far from perfect. the fabric is runched and even wrinkly. this method is probably not fit for a perfectionist. also, i had some white trim so i did apply that with my hot glue gun to the top and bottom as well.}
Now, on to the brass base. Here's the before:

The supplies I used:
liquid sander, krylon dual paint + primer (i did not like that product... next time i will just use my regular rustoleum primer), krylon spray paint (color- almond, finish- satin), rag and fine grit sanding sponge

I wiped down the brass base of the lamp with the liquid sand {per my husbands recommendation... i just do what he tells me people... he's usually right about this kind of stuff} Then I sprayed 1 coat of the primer. When that was dry I did a light sand with my sanding sponge. After wiping it down with a dry cloth to remove the dust from sanding, I sprayed a coat of the krylon almond spray paint... let it dry and then another light sand. I wiped the dust off again and then sprayed the final coat of spray paint. I'm glad I did all these steps because the finish really did turn out great. It was worth the "fuss".
Here's how the lamp turned out:

I will put one on each side of my pink sofa but I haven't found my side tables yet. So I just played around with them today and enjoyed how sweet and shabby they turned out :)

Linking To:
The Farmhouse Porch
Knick of Time
Faded Charm
Savvy Southern Style
Primp
The Vintage Farmhouse
Rooted in Thyme
French Country Cottage
The Shabby Nest
white ruffled fabric (walmart), hot glue gun, tacky glue, scissors, and pins

I started by wrapping the fabric around the shade and then cutting it to size (roughly).
Then, I simply started pinning the fabric to the shade making sure to leave extra fabric over the top and bottom of the shade.

After I had it all pinned in place, I glued the extra fabric on the top and bottom of the shade to the inside of the shade with the hot glue gun. It worked great.

Then for the "seam" where the fabric met and overlapped slightly... I just used the tacky glue.

Here's how the shade turned out...

{of note: i love the look of shabby chic so it's far from perfect. the fabric is runched and even wrinkly. this method is probably not fit for a perfectionist. also, i had some white trim so i did apply that with my hot glue gun to the top and bottom as well.}
Now, on to the brass base. Here's the before:

The supplies I used:
liquid sander, krylon dual paint + primer (i did not like that product... next time i will just use my regular rustoleum primer), krylon spray paint (color- almond, finish- satin), rag and fine grit sanding sponge

I wiped down the brass base of the lamp with the liquid sand {per my husbands recommendation... i just do what he tells me people... he's usually right about this kind of stuff} Then I sprayed 1 coat of the primer. When that was dry I did a light sand with my sanding sponge. After wiping it down with a dry cloth to remove the dust from sanding, I sprayed a coat of the krylon almond spray paint... let it dry and then another light sand. I wiped the dust off again and then sprayed the final coat of spray paint. I'm glad I did all these steps because the finish really did turn out great. It was worth the "fuss".
Here's how the lamp turned out:
I will put one on each side of my pink sofa but I haven't found my side tables yet. So I just played around with them today and enjoyed how sweet and shabby they turned out :)

Linking To:
The Farmhouse Porch
Knick of Time
Faded Charm
Savvy Southern Style
Primp
The Vintage Farmhouse
Rooted in Thyme
French Country Cottage
The Shabby Nest
posted by The Cottager at
10:57 PM
6 Comments
![]()
![]()

